Table of Contents
Despite the name, no one actually loves their love handles. Love handles are defined as the bulge that stays on the side of your stomach. In case of women, it can spread right from the side to the back while for men it usually leads to quicker development of a paunch. So, if you want to lose love handles fast, test yourself and try yoga. These five yoga poses target your abdominal muscles to help you lose love handles. Building abdominal strength can decrease back pain, improve posture, and shrink love handles.
1. Cobra Pose
Lie on your stomach with your toes flat on the floor and forehead resting on the ground. Keep your legs close together, with your feet and heels lightly touching each other. Place your hands (palms downwards) under your shoulders, keeping your elbows parallel and close to your torso. Taking a deep breath in, slowly lift your head, chest and abdomen while keeping your navel on the floor. Pull your torso back and off the floor with the support of your hands. Make sure you are putting equal pressure on both the palms.
Keep breathing with awareness, as you curve your spine vertebra by vertebra. If possible, straighten your arms by arching your back as much as possible; tilt your head back and look up. Breathing out, gently bring your abdomen, chest and head back to the floor.
2. Warrior II Pose:
From a standing position, step your feet apart about three to four feet. Turn your back foot perpendicular and align the front heel with the arch of your back foot. Extend your arms while gently twisting your body so that the right arm extends over the right leg or vice versa. Turn your head and gently focus your gaze over your front-facing fingertips. Bend and sink into your front leg so that it is in a lunge position. If your knees bends in front of your toes, step your foot out further. With a strong core, hold this pose and breathe. Repeat in the opposite direction.
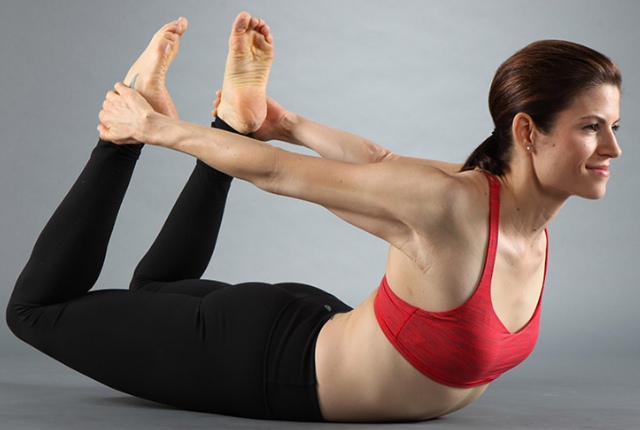
3. Bow Pose:
Lie face down on your mat. Bend your knees and bring your heels toward your butt. Reach back with both hands and grab each foot from the outside of your body. Take a deep breath in and on the exhale push the tops of your feet into the palms of your hand allowing the front of the body to lift and stretch and your knees and thighs to rise from the floor. Keep your chin and gaze in a neutral position looking toward the floor. Hold and breathe, and if comfortable, rock slightly from front to back.
4. Extended Triangle Pose
Stand erect. Now, keep distance between your legs about 3 to 4 feet. Extend your arms at the shoulder level. Inhale and raises your right arm by the side of your head. Now, bend your right arms with exhaling towards the left side by keeping your body weight equally on both the feet. You should ensure that the right arm become parallel to the ground. Maintain the position as per your comfort with normal breathing and come to the original position by inhaling. Do the same procedure with the left arm.
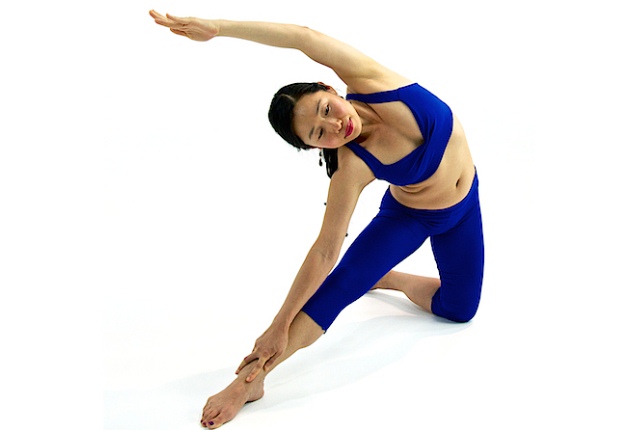
5. Gate Pose
Kneel on the floor such that your knees are hip width apart and thighs parallel. Stretch out your right leg to the right side. The sole of the right foot should be flat on the floor and toes should be pointed forward. The right leg should be straight without locking the knee. Place the right hand on the outer edge of the right thigh. Inhale and bring the left arm overhead, and fingers pointed towards the ceiling with palm facing your right side. The left upper arm should be close to the left ear throughout. Exhale while bending from the waist as you stretch out to the right. Your left shoulder should be back and relaxed at this time.
Bring the right hand down the outer edge of the right leg. It should be straight but elbow should not be locked. Look past your left elbow. Press the right foot into the floor while extending out through the finger tips and the crown of the head. Hold the pose for 10 to 20 seconds. Exit the pose by inhaling and making the torso straight. Now exhale and keep your arms to the side with your knees joined. Perform steps from 2 to 11 for the other side.
Caution: Please use Home Remedies after Proper Research and Guidance. You accept that you are following any advice at your own risk and will properly research or consult healthcare professional.


